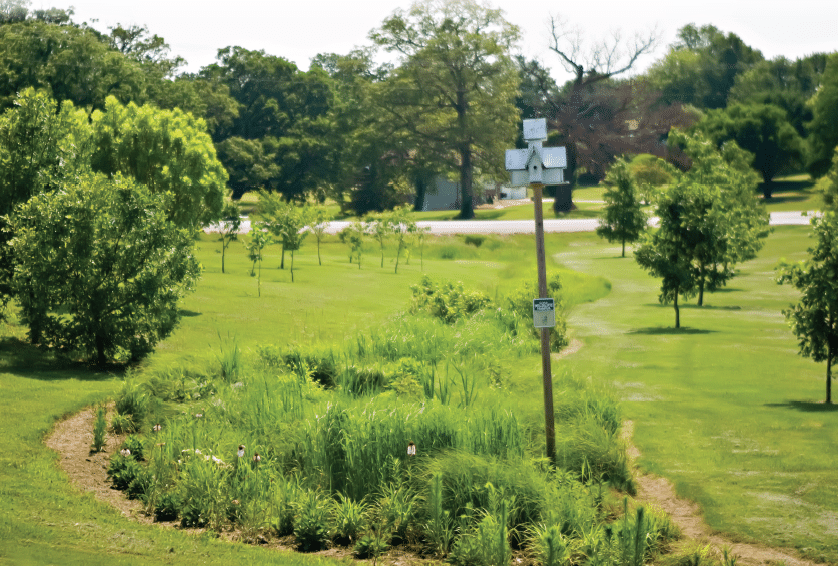
Rain gardens have increased in popularity as working landscapes. Bioswales are similar, but a larger scale. Both “green solutions” have their roots in natural wetlands and the grassy swales of farms.
Both offer a natural alternative or enhancement to sewer systems of communities. They combine nature and science to reduce runoff volume and flow rate naturally.
WITH NATURE
Rain gardens can be as beautiful as they are functional. They use deep roots of native plants to help absorb, filter and direct stormwater. The native plants used add seasonal interest and sense of place. As a bonus, they create habitats for birds, butterflies and other pollinators.
WITH SCIENCE
These special plantings use physics to calculate their size and shape. Rain gardens are smaller with rounded shapes, sloped sides and flat bottom. Bigger bioswales are usually linear with a parabolic, trapezoidal or v-shape. Gravel or similar permeable materials added below the base helps increase storage capacity. They are often used along roadways and sidewalks or to boost drainage swales. Neither are appropriate in areas with steep or unstable slopes due to risk of erosion.
During the first season, hardwood or gravel mulch help prevent weeds. A quick weeding once a month and deadheading will help prolong blooming. Supplemental watering helps keep plants blooming during the first season if it’s dry. Fertilization is not necessary. A late fall cleanup encourages vigor and growth in the following year. Cut back perennial plants to six inches tall and remove dead vegetation. After several seasons, divide large clumps, if desired, and create more gardens.
Top 10 rain garden/bioswale plants:
• Swamp milkweed
• Blue cardinal flower
• Purple coneflower
• Rose mallow
• Blue star
• New England aster
• Tussock sedge
• Common rush
• Little bluestem
• Prairie dropseed
What if my soil doesn’t drain well? Will I attract mosquitoes?
If your soil is clayey, increase the size of your rain garden. Another option is to amend your site’s soil (50-60% sand, 20-30% topsoil, 20-30% compost). Properly constructed and planted, the site should only hold water for a few short hours. Not enough to attract mosquitoes and allow them to propagate.
CARE AND COSTS
Costs associated with rain gardens and bioswales include both installation costs and annual maintenance costs. Native grasses and plants need less water, no fertilizer and infrequent mowing or trimming. Vegetation should be kept taller than your design’s water flow depth. In time, a large bioswale may need periodic regrading to remove sediment and restore the proper flow. Annual inspections help identify bare soil, erosion, sediment and debris. A maintenance guide about its design, function and proper care is key. Signage serves as a reminder to landscape crews. And, education for your public builds acceptance and duplication.
How To Build A Rain Garden or Bioswale
STEP 1: CHOOSE YOUR SITE
Rain gardens and bioswales should be on a low side, 10 feet or more away from any structures.
STEP 2: DETERMINE THE SIZE
Determining the size is an important step in creating your rain garden or bioswale. Calculate the size of the area where rain will fall and runoff. Divide the square footage by three to capture about 1/3 of the stormwater.
For example, the runoff of a 2100 square-foot area requires a 700 square foot project. A low earth berm built from excavated soil will help hold and filter stormwater into the soil.
STEP 3: DIG!
Your rain garden or bioswale needs to be at least six to 12 inches deep. The gradual side slopes help improve collection of rain. If there’s a downspout nearby, make sure it’s facing the bioswale.
STEP 4: CHOOSE, ARRANGE and PLANT!
The fun part. Filling your site with native plants that will do the work. RPM plants give your garden a headstart. Plants also create a predictable appearance and help crowd out weeds. Your native perennials will return each year and increase.
To calculate the number of perennials planted on 18” centers, divide your area by 2.25. For a large rain garden or bioswale, use native shrubs or custom-grown seedlings to save money. Perennial wildflowers added along the edges and in between will add color punch.
The next step is to arrange your plants. It’s simple to create your own design. Just group your plants with height, color and seasonal bloom in mind.
• Think bold. Moisture-loving plants grow more robustly than their dry-site counterparts. Allow for plants to fill out.
• Remember your greens. Native grasses, rushes and sedges provide textural contrast and year-round interest.
• Plan for change. Get extra zip from any garden design by planning for a change of color scheme. Spring’s pastel goat’s beard, phlox and blue flag can be followed by bold summer and fall hues. Think bold with coneflower, cardinal flower, blazing star and milkweeds followed by tawny grasses, asters and showy goldenrod.

